How to Draw Tractors: A Beginner's Guide
Ready to draw some amazing tractors? This step-by-step guide is perfect for everyone, from kids who love farm equipment to adults looking for a fun, creative project. We'll build your tractor from simple shapes, making it easy and enjoyable! For more tractor drawing inspiration, check out this helpful guide.
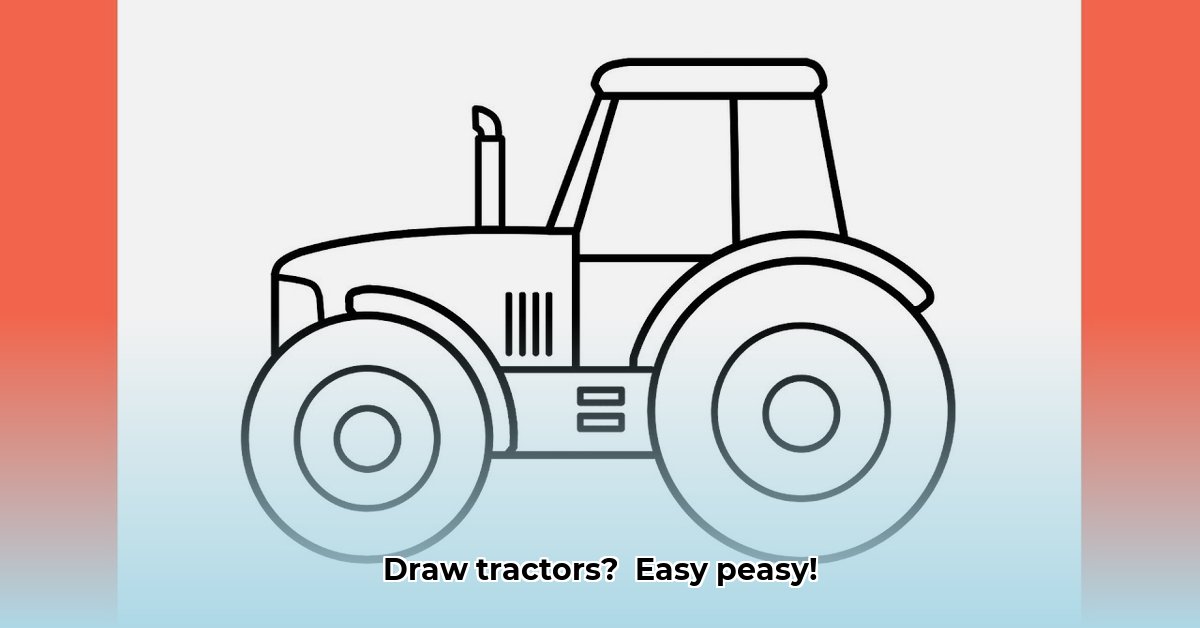
Step 1: Building Blocks – Basic Shapes
First, let's create the tractor's foundation using simple shapes. Lightly sketch a large rectangle – this will be the main body. Add a smaller rectangle on top, slightly overlapping; this is the driver's cab. Underneath the main body, draw two circles for the wheels – one slightly larger than the other for realism. Don't worry about perfect shapes; these are just guides!
Step 2: Refining the Shapes
Now, let's make those shapes look more like a real tractor. Gently adjust the edges of the rectangles and circles, adding curves where needed. Add simple details like an exhaust pipe (a slightly curved line extending from the back), headlights (two small circles on the front), and a small rectangle for the front grill. It's starting to look like a tractor already!
Did you know that the average tractor uses about 10 gallons of fuel per hour? This is why engineers continuously work to improve efficiency.
Step 3: Detailed Wheels
Let's bring those wheels to life! Carefully erase extra pencil lines inside your wheel circles. Draw two smaller circles inside each wheel to represent the tire treads. Add short, slightly curved lines within the treads for texture. These small details add so much realism!
"Adding these small details is key to realistic drawings," says Anya Petrova, Art Instructor at the Academy of Fine Arts. "It's all about observation and attention to detail."
Step 4: Adding the Finishing Touches
Time to get creative! Add details to personalize your tractor. Draw a small rectangle under the main body for the hitch. Inside the cab, sketch a driver's seat, steering wheel, and maybe even a friendly farmer!
Step 5: Shading and Finishing Touches
Almost done! Gently erase unnecessary lines. Use a slightly darker pencil to add shading, creating depth and dimension. Darken areas under the tractor, behind the wheels, and under the cab. Highlight areas where light would hit directly—the top of the cab and the front of the tractor, for example.
Have you considered the different types of tractors? From compact models for small farms to giant models used for large-scale agriculture, the diversity reflects the evolving landscape of farming!
Tips for Success
- Light Pencil Strokes: Use light strokes for initial sketches. This allows for easy erasing and adjustments.
- Real-Life Inspiration: Look at pictures of tractors online or in magazines; observing real-world examples is invaluable.
- Practice: Don't be discouraged if your first try isn't perfect. Keep practicing; drawing is a skill that improves with time and effort!
- Have Fun: Enjoy the process! Relax, experiment, and let your creativity shine!
What other farm equipment would you like to draw? Perhaps a combine harvester or a plow? Applying these same basic steps and adding details makes drawing any vehicle a fun and rewarding challenge. Remember, practice makes perfect, and the most important aspect is having fun with the creative process!